Unlocking the Secrets: The Ultimate Guide to Hosting a Static Website on Amazon S3 with free SSL
Amazon S3 is considered one of the best ways to host a static website and yet there is no proper guide for doing the same... Let's solve that today!


Services Used :
AWS S3
AWS Route 53
AWS Certificate Manager
AWS CloudFront
Namecheap Domain
Let's Dive Right In!
Login into your AWS Console.
Make sure your Location is set to
US East (N. Virginia)us-east-1, This is crucial to get the free SSL certificate.

Creating a Hosted Zone
Head onto the search bar and search for "Route 53", Star it so that it shows up in the taskbar for easy access.

Once you are on the Route 53 Homepage click on Create Hosted Zone under DNS Management in Route 53 Dashboard

Now in the hosted zone configuration under the Domain Name enter your fully qualified domain name which in my case is "vinayakchhatrashali.me"; leaving the rest unchanged head to the bottom and hit Create hosted zone button.

This will redirect you to the Hosted zone details page where under the Records section you will find two different types of records, the one with the type NS is what we'll look into.

Copy the 4 values for this NS type record these are what we'll update the Nameservers with.
Changing the Nameservers in Namecheap
Head on to your Domain Provider's website and under DNS Management update the Nameservers by selecting a Custom DNS.
Copy all 4 values from the previous step and paste them into the Nameservers section. Don't forget to save the changes.
Make sure you copy the complete value from the NS Type Record including the period in the end.

Getting a free SSL Certificate
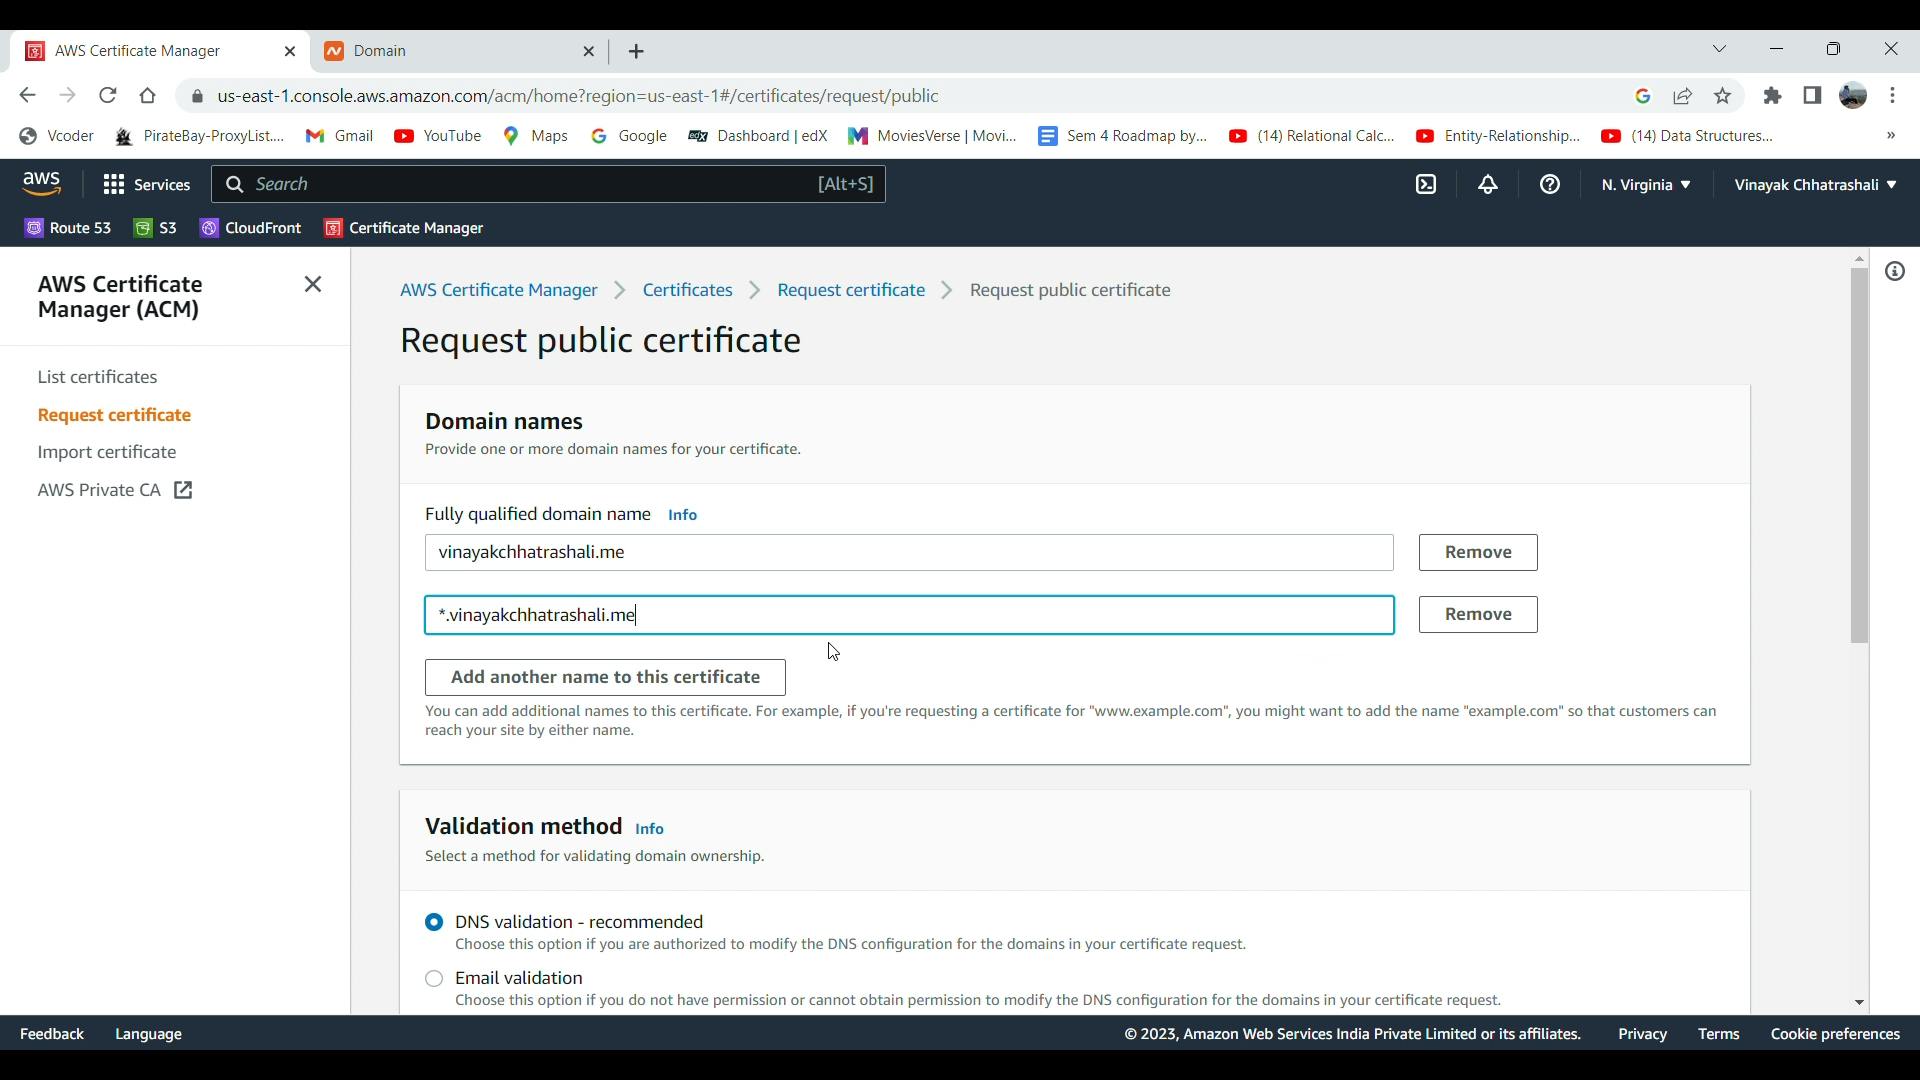
Head on to AWS Certificate Manager from the AWS Console and Request a certificate, under the certificate type request a public certificate.
Make sure the location is set to
US East (N. Virginia)or else this won't work
Now under the Domain names card under fully qualified domain name enter your domain name : vinayakchhatrashali.me in my case
Now click on Add another name to this certificate and add "*." in front of your fully qualified domain name, this is a wildcard and ensures that you can use other subdomains such as www. , hit Request
Now under the certificates section, you will see your certificate with the status as pending validation, keep in mind it takes quite some time for the certificate to get issued, be patient.

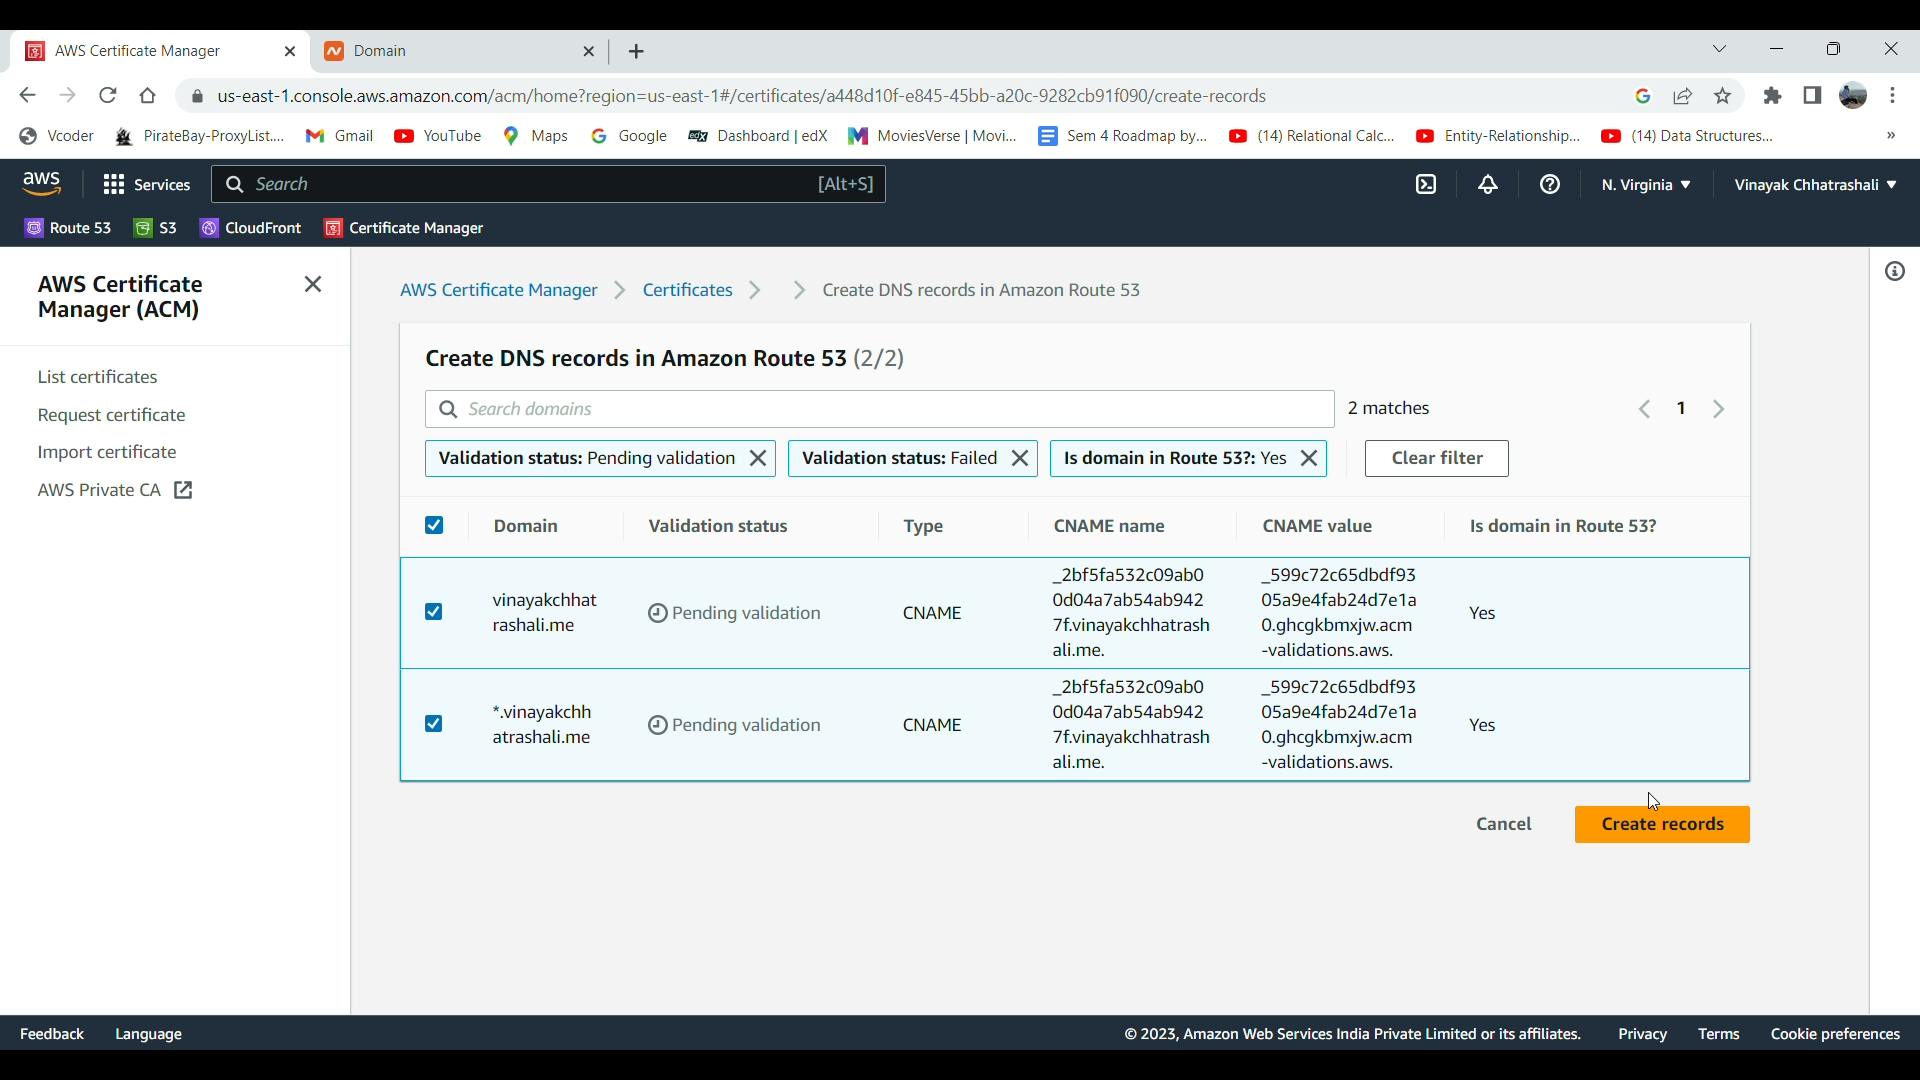
Now click on the certificate id and under the Domains card click on Create records in Route 53 button on the upper right corner, select both the domains: the naked domain and the wildcard domain(*.) and click on Create records
The validation status will change to success in some time and it will look something like this:
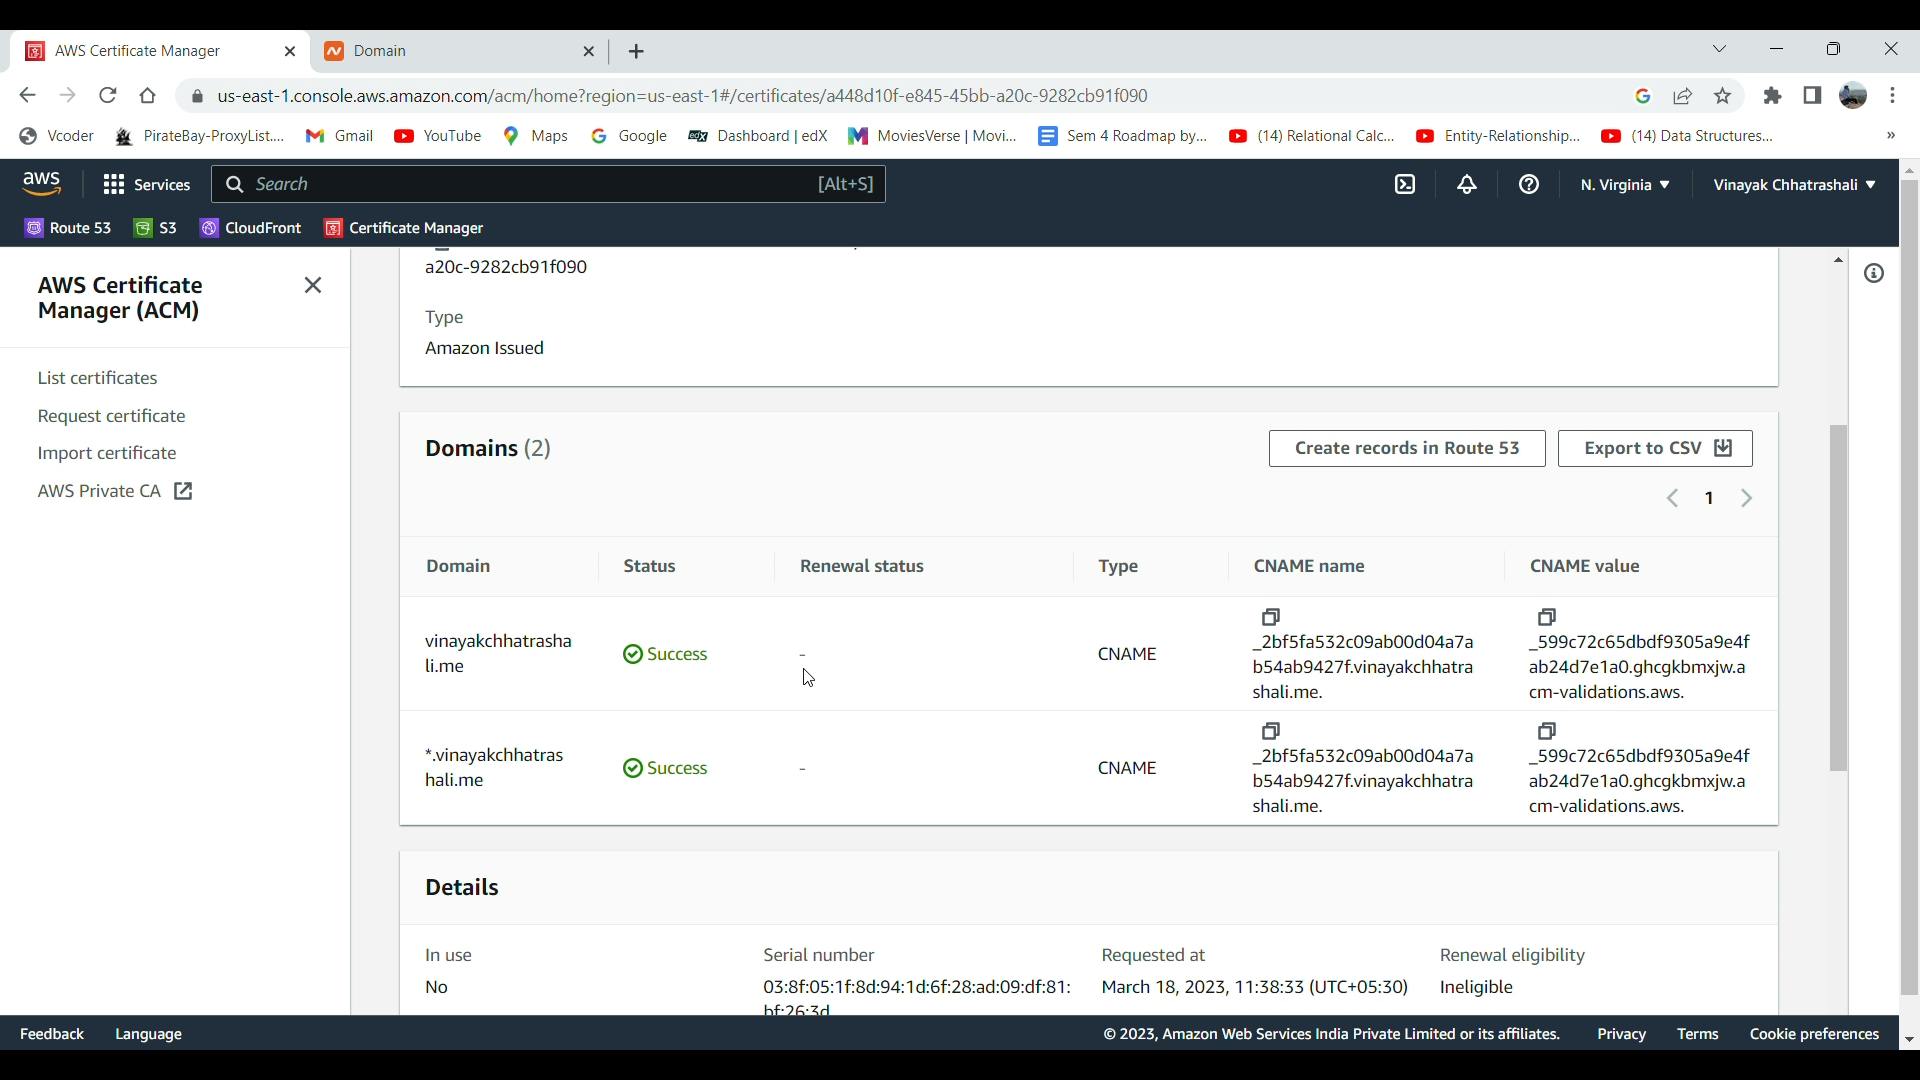
Voila! You have got yourself a free SSL certificate.
Creating S3 Buckets
Head onto the S3 service page from the AWS console and create a new bucket.
Keep the bucket name the same as the name of your naked domain name : vinayakchhatrashali.me in my case and make sure the AWS Region is set to US East (N. Virginia) to maintain uniformity.
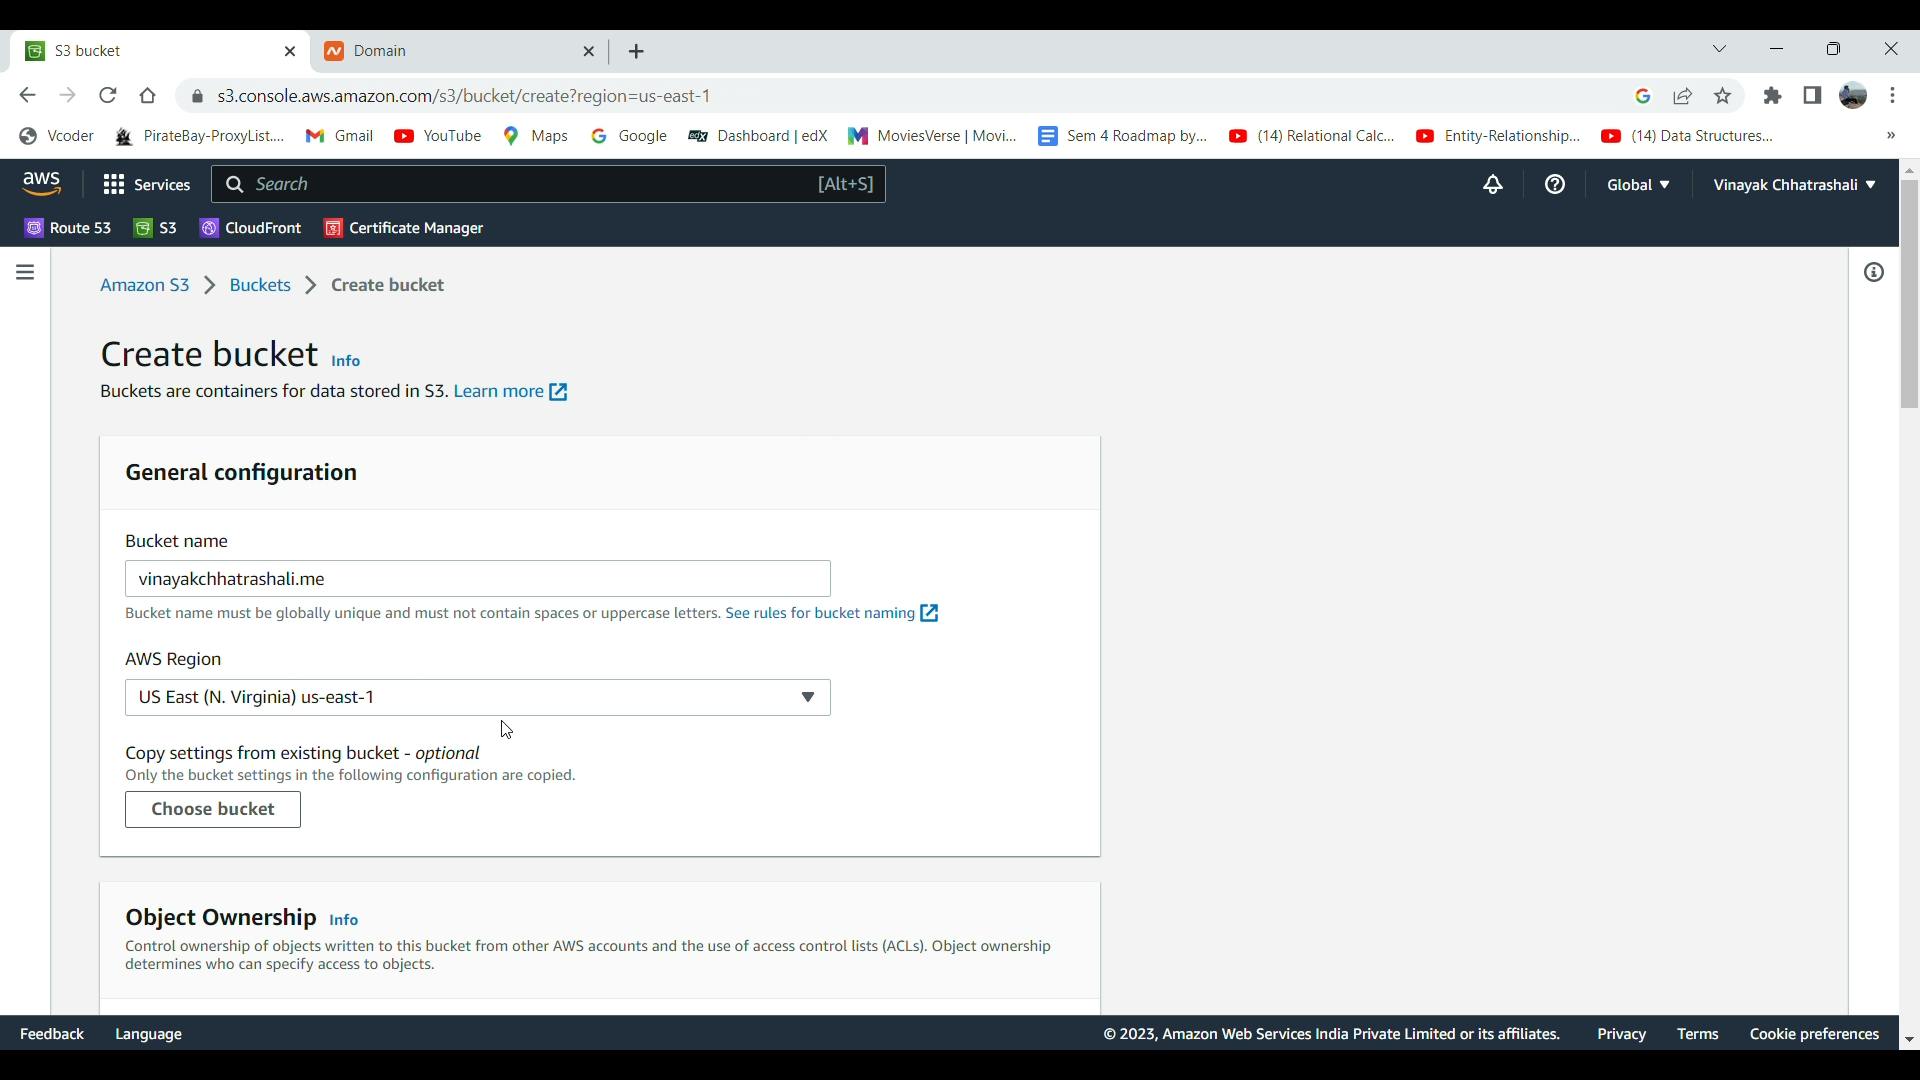
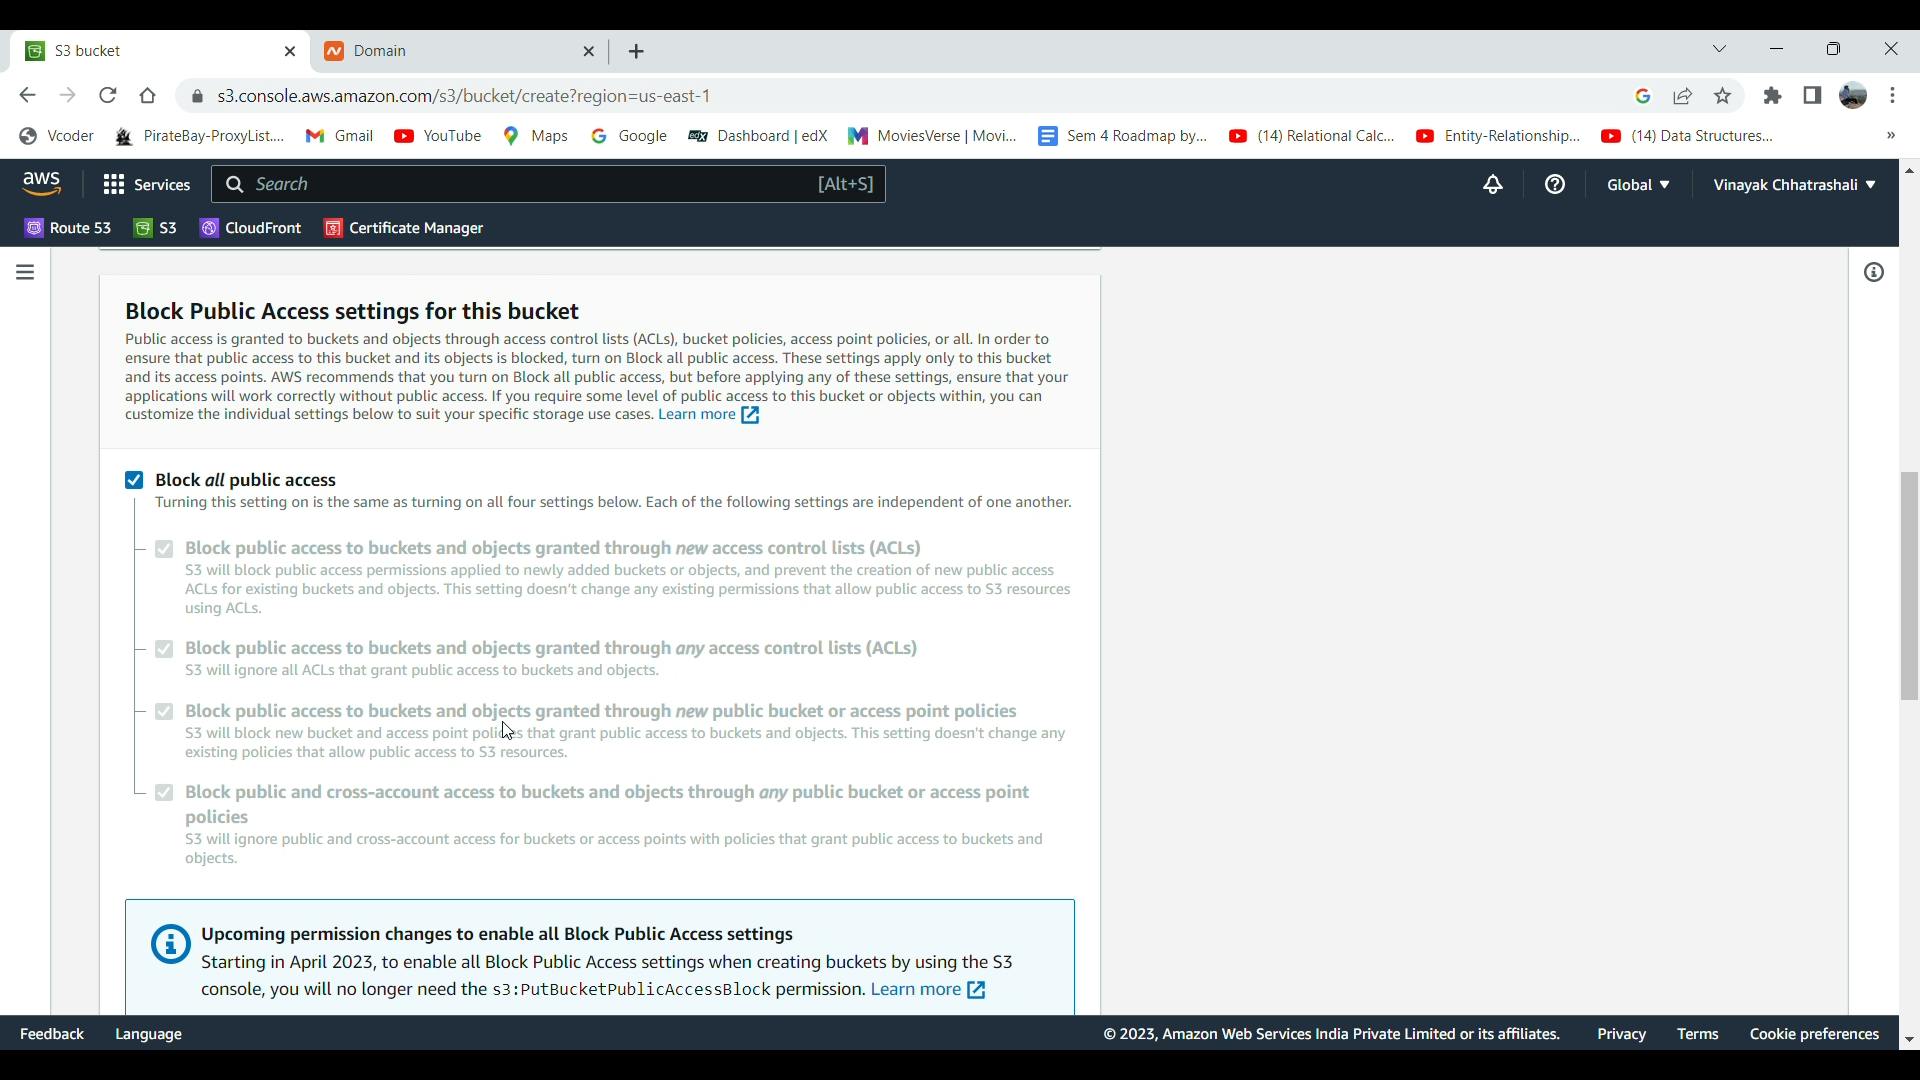
Make sure Block all public access is ticked, we will change the access using CloudFront later in the tutorial. Leave the rest as same and hit Create bucket at the bottom.
You'll now see your created bucket under the Buckets card.

Click on the bucket name this will open up the Objects card, click on upload to upload your website files.

Click on Add files and Add folders to add files and folders respectively and hit Upload.

Make sure the index.html is at the root location or else the website won't load.
The upload will take some time to finish, once it's done you'll see your files under the objects. Now head onto the properties section from the bucket taskbar and scroll to the bottom to Static website hosting and click Edit


Enable static website hosting and under the index document section put in the name of your index document in our case : index.html and hit Save changes

Create another bucket with www. in front of the domain name in our case www.vinayakchhatrashali.me, all the settings are the same as the previous bucket.

We are not going to upload anything on this bucket we are just going to use this to redirect requests to our naked domain name bucket.
Head onto the properties of this newly created bucket with www.vinayakchhatrashali.me
Under the Static website hosting section click on Edit and Enable Static website hosting. Now this time instead of selecting the Hosting type as Host a static website we are going to select Redirect requests for an object
Under the Hostname put the name of your naked domain here vinayakchhatrashali.me and under protocol select https hit Save changes

Creating a CloudFront distribution
Head onto the CloudFront homepage from your AWS Console and create a new CloudFront Distribution.

Under origin domain choose the one with the naked domain, and AWS auto-generates this for us in the dropdown.

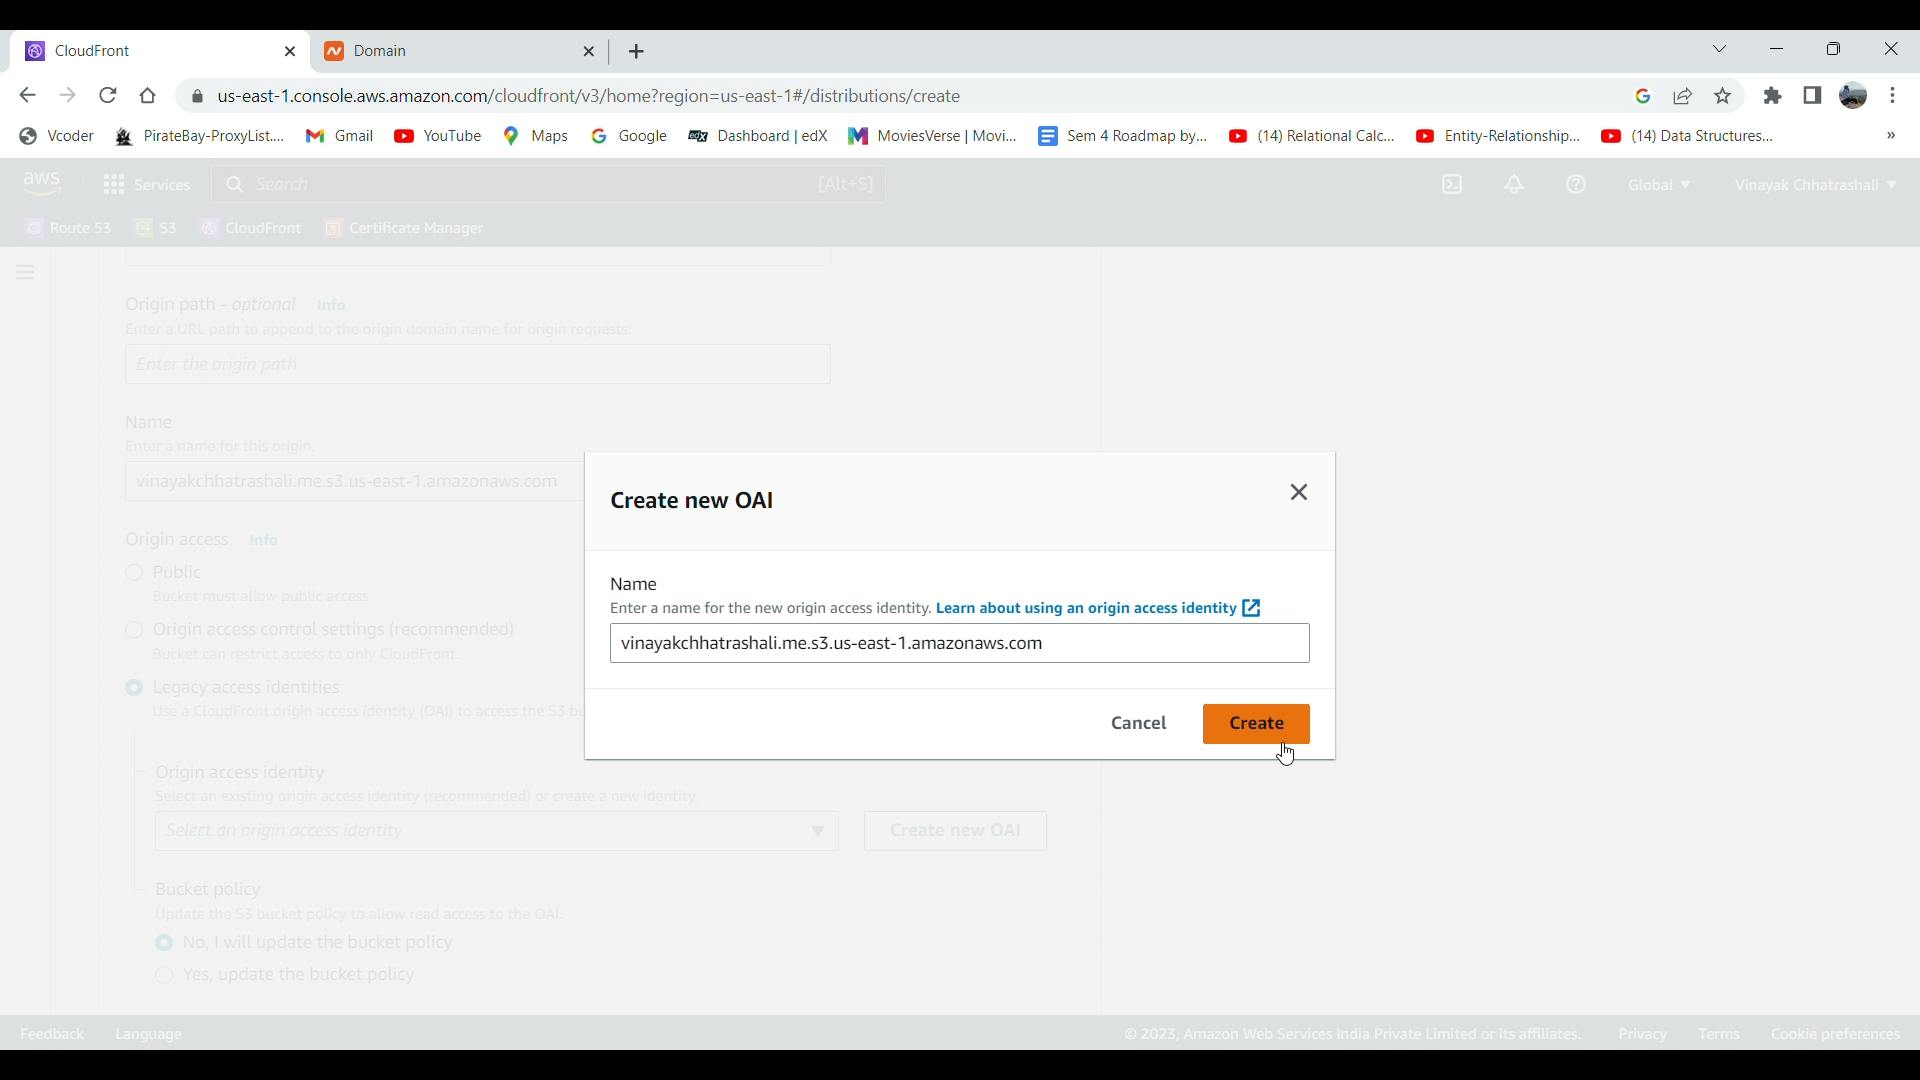
Under origin access select legacy access identities and click on Create new OAI

AWS auto generates this for us hit Create
Under Bucket Policy select Yes update the bucket policy, this gives CloudFront access to change the public access which was initially blocked while creating the buckets.
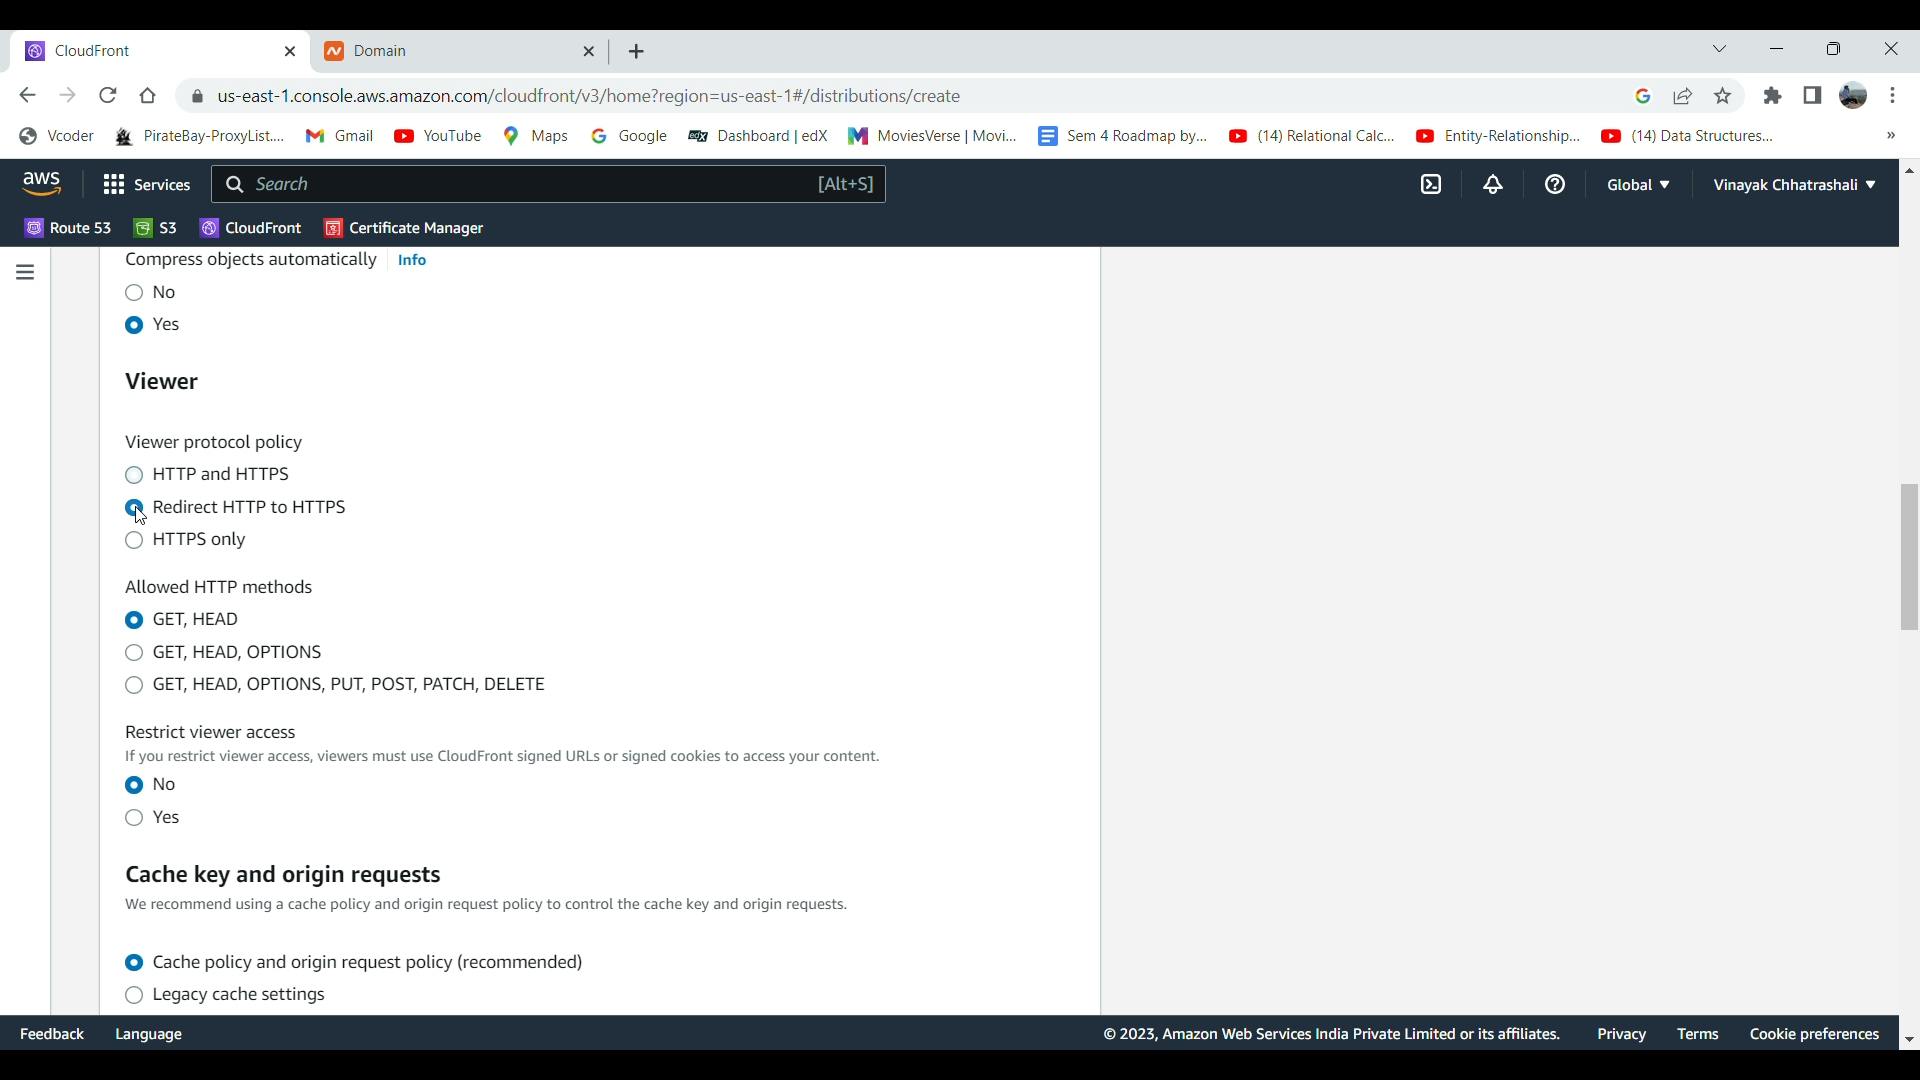
Under the Viewer section select Redirect HTTP to HTTPS
Under the Alternate domain name (CNAME)-optional section add both our domain name with and without the www.
Before adding the www. domain name make sure the certificate has been issued or else you won't be able to add it.
Under Custom SSL certificate section select the certificate issued from the dropdown.

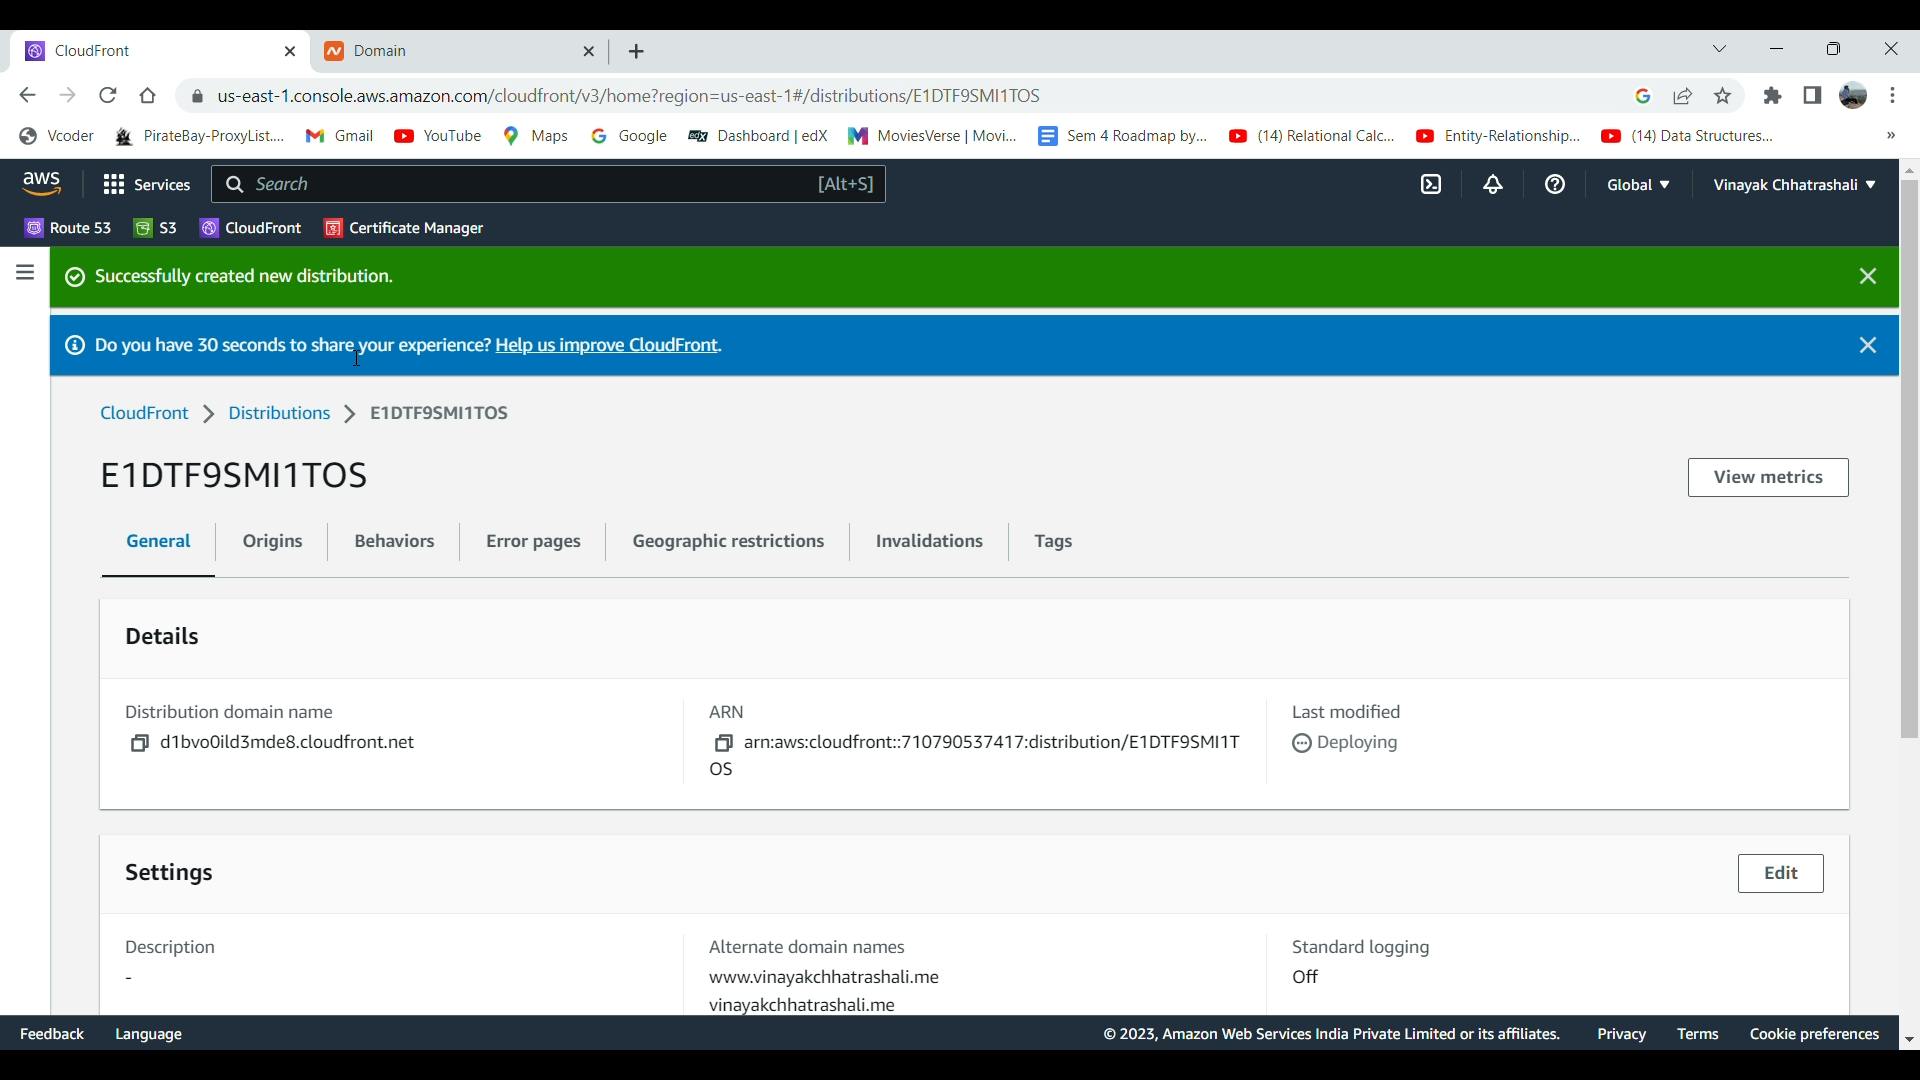
Under the Default root object section enter index.html or the name of your root element if different and Create distribution.

This will redirect you to the following page:
Now, this is a very crucial step, head to the S3 bucket page and select the bucket with your naked domain name.

In the properties tab under the Static website hosting copy the Bucket website endpoint.

Now head over to the CloudFront Distribution and select the distribution we just created, under the Origins tab click Create origin

Under Origin domain paste the endpoint we just copied from the S3 bucket and Create origin

This will take some time to propagate and once done our website will be hosted at a funny-looking address which you can find under General Settings of your distribution under Distribution domain name

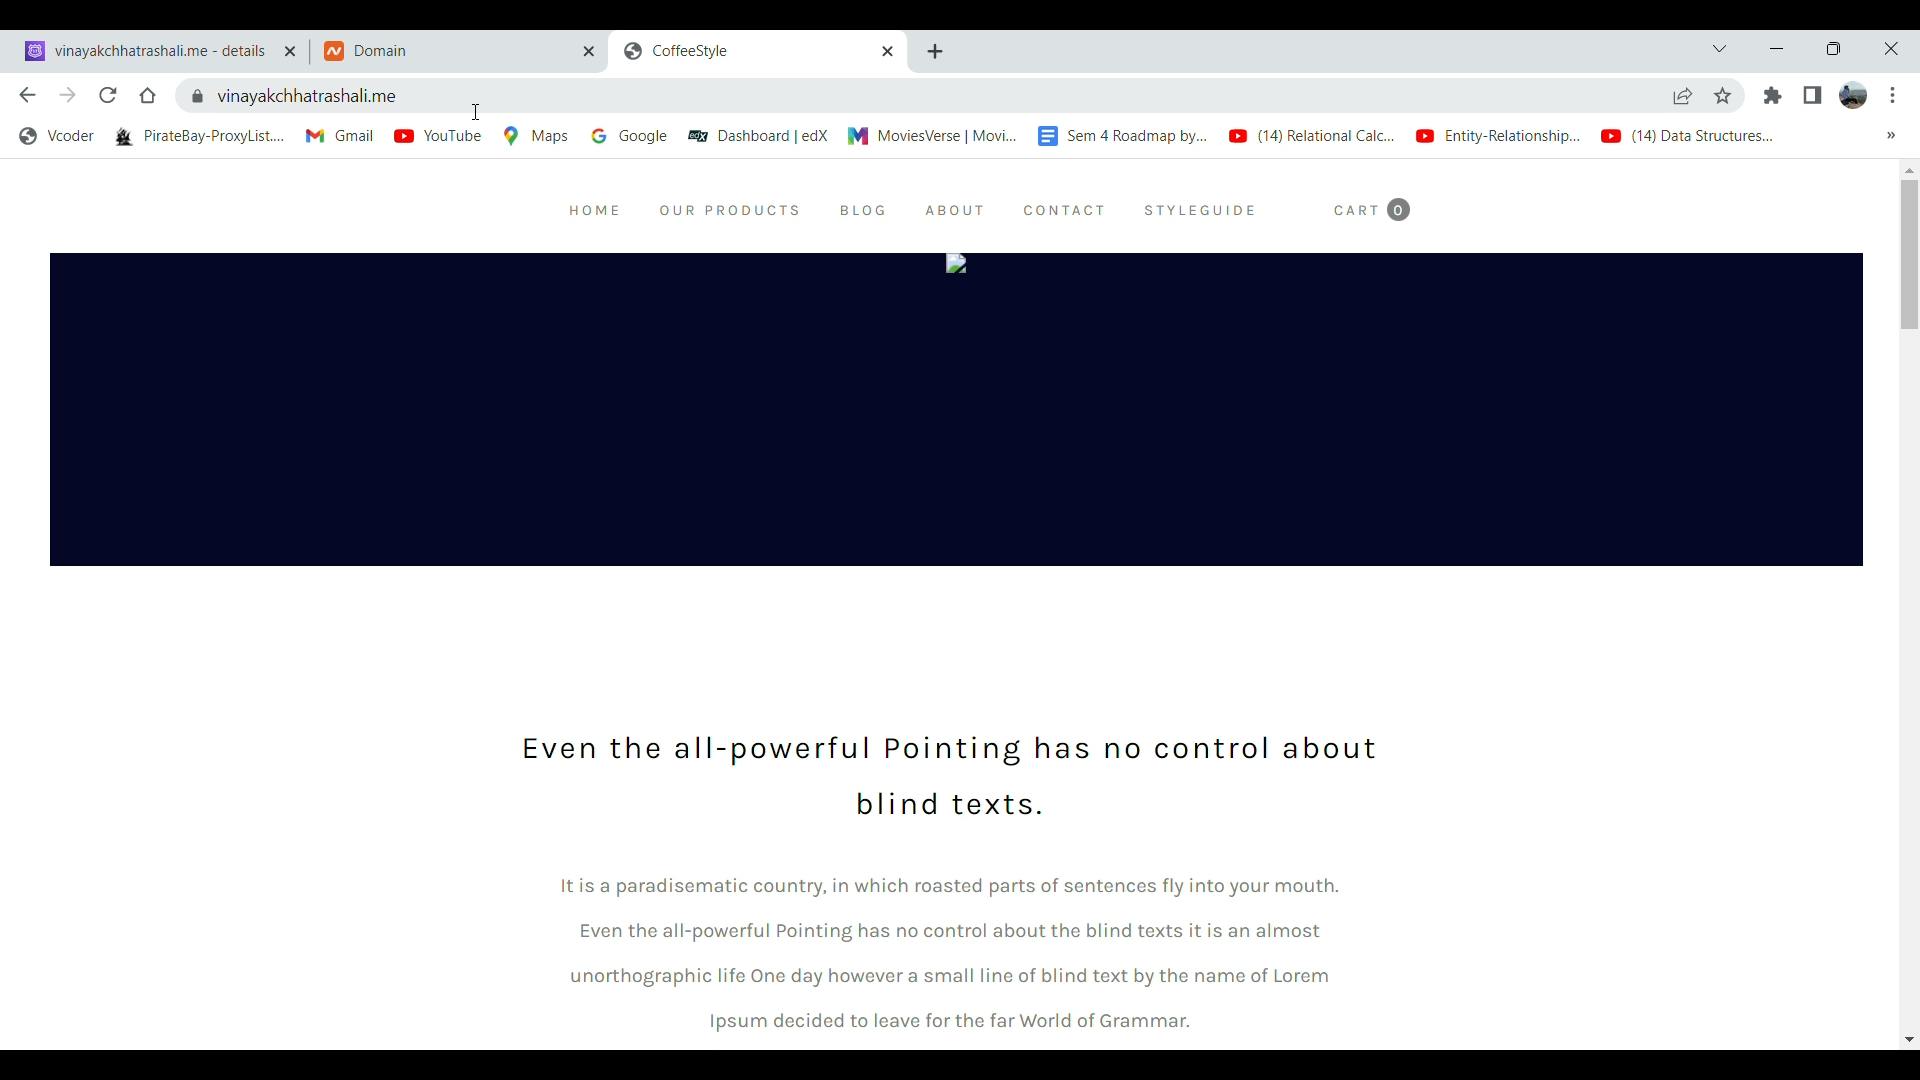
The website can now be accessed using this address

Linking our domain name to CloudFront using Route 53
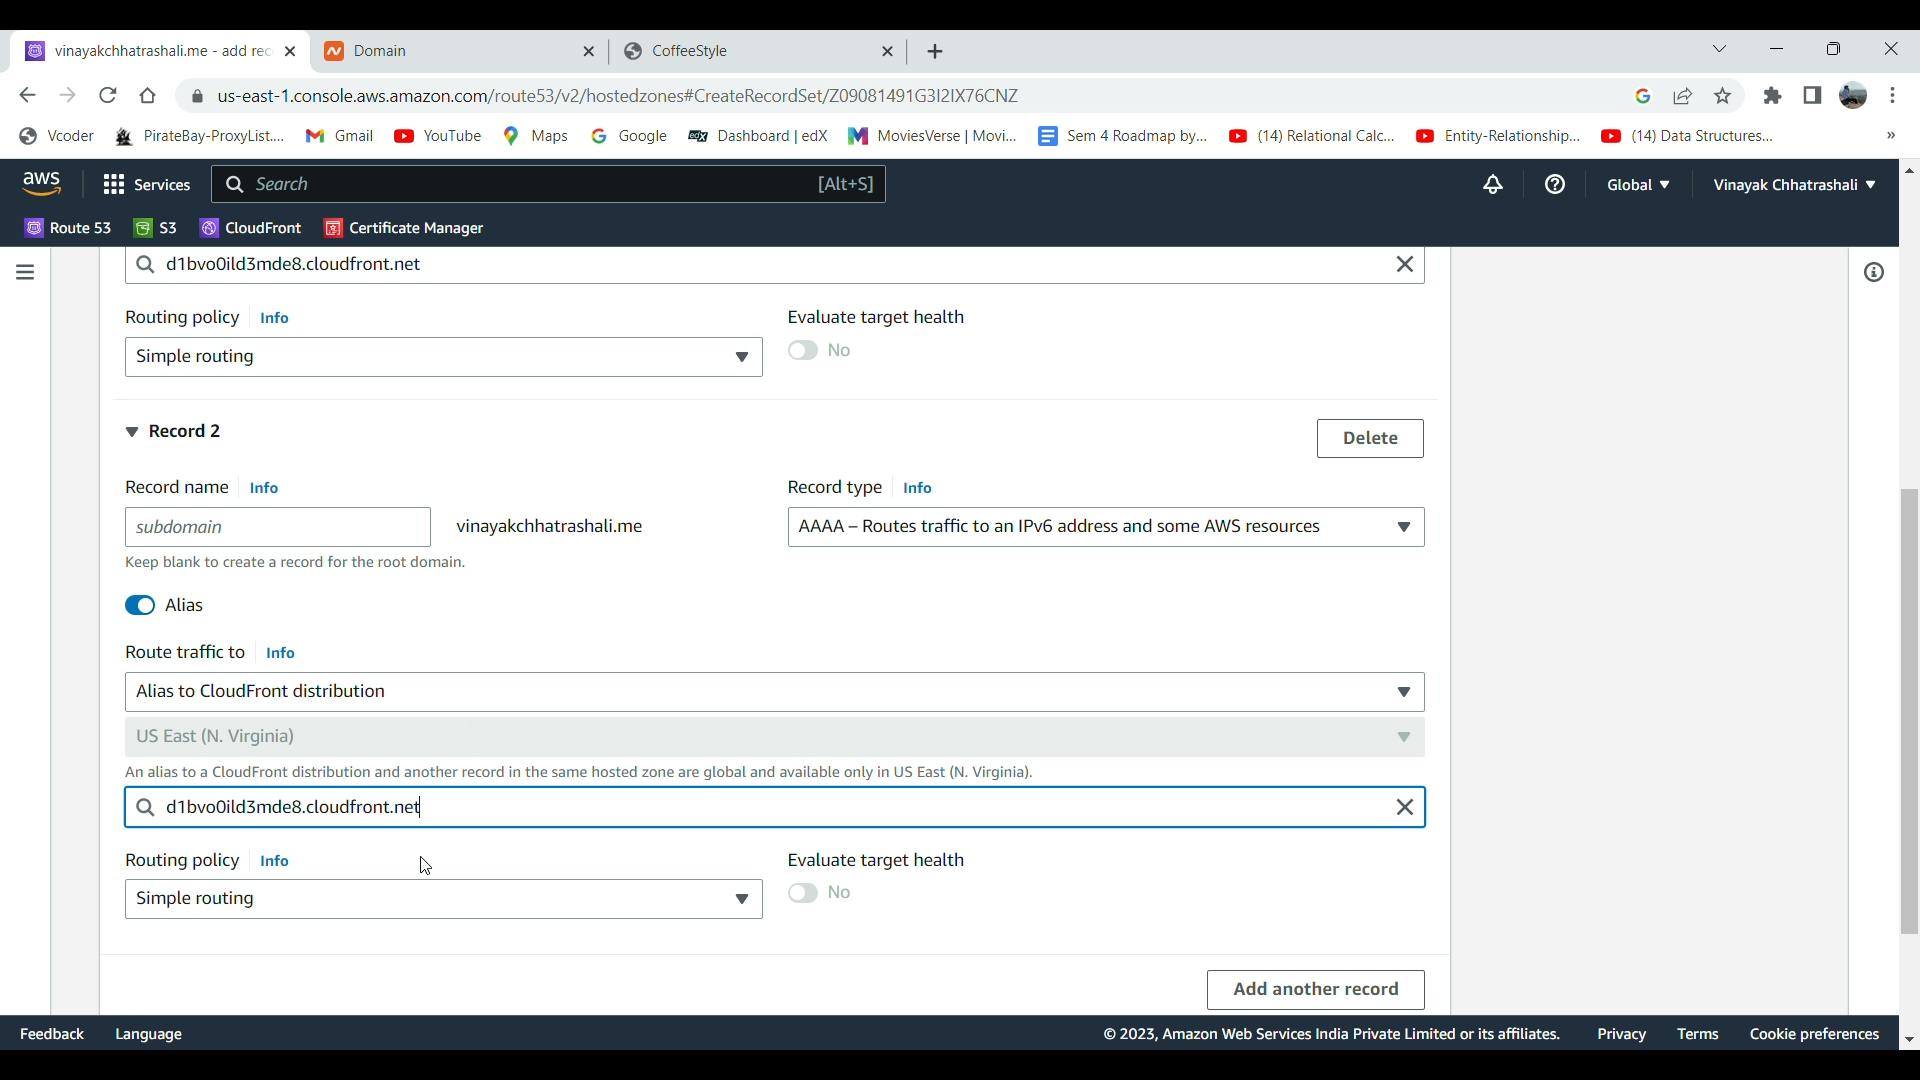
Our website is now hosted but we want it to be accessed using our domain name we need to add a few records in Route 53, 4 to be precise to make our website accessible using our custom domain name.
Head onto Route 53 Dashboard from your AWS Console and under DNS Management click on Hosted zone. Select your hosted zone to create records.

Click on Create record and create 4 new records as follows:
Record 1:
Record name - Leave blank
Record type - A
Turn on Alias
Route traffic to - Alias to CloudFront distribution
Choose distribution - automatically generated in the dropdown

Record 2:
Record name - Leave blank
Record type - AAAA
Turn on Alias
Route traffic to - Alias to CloudFront distribution
Choose distribution - automatically generated in the dropdown
Record 3:
Record name - www
Record type - A
Turn on Alias
Route traffic to - Alias to CloudFront distribution
Choose distribution - automatically generated in the dropdown

Record 4:
Record name - www
Record type - AAAA
Turn on Alias
Route traffic to - Alias to CloudFront distribution
Choose distribution - automatically generated in the dropdown

Hit Create records and we are done.
Conclusion
And there you go our website is now successfully hosted and can be accessed using our custom domain name.